API Keys
API Keys are required to use thirdweb’s infrastructure services including Storage, RPC Edge, Smart Wallets, and Embedded Wallets.
API Keys allow you to:
- Upload and download assets to IPFS using Storage via dashboard, CLI, or SDKs
- Use a dedicated RPC Edge service in your application
- Use Bundler & Paymaster services for your Smart Wallets
- Enable various services such as signing in with Google, Email, and Custom JWT when using Embedded wallets.
API Keys consists of two components:
- Client ID- Used to access the enabled thirdweb infrastructure services and identify your application using an app bundle ID (identifier for native apps) or domain (identifier for websites). Client IDs can be restricted to allow only specified domains and app bundle IDs to access the enabled services.
- Secret Key- Used to access the enabled thirdweb infrastructure services by identifying and authenticating your application from a backend. Sharing or exposing this key to others is unsafe because it grants access to all services.
Create an API Key
To create an API key:
Log in to the dashboard and navigate to Settings > API Keys view.
Select
Create API Key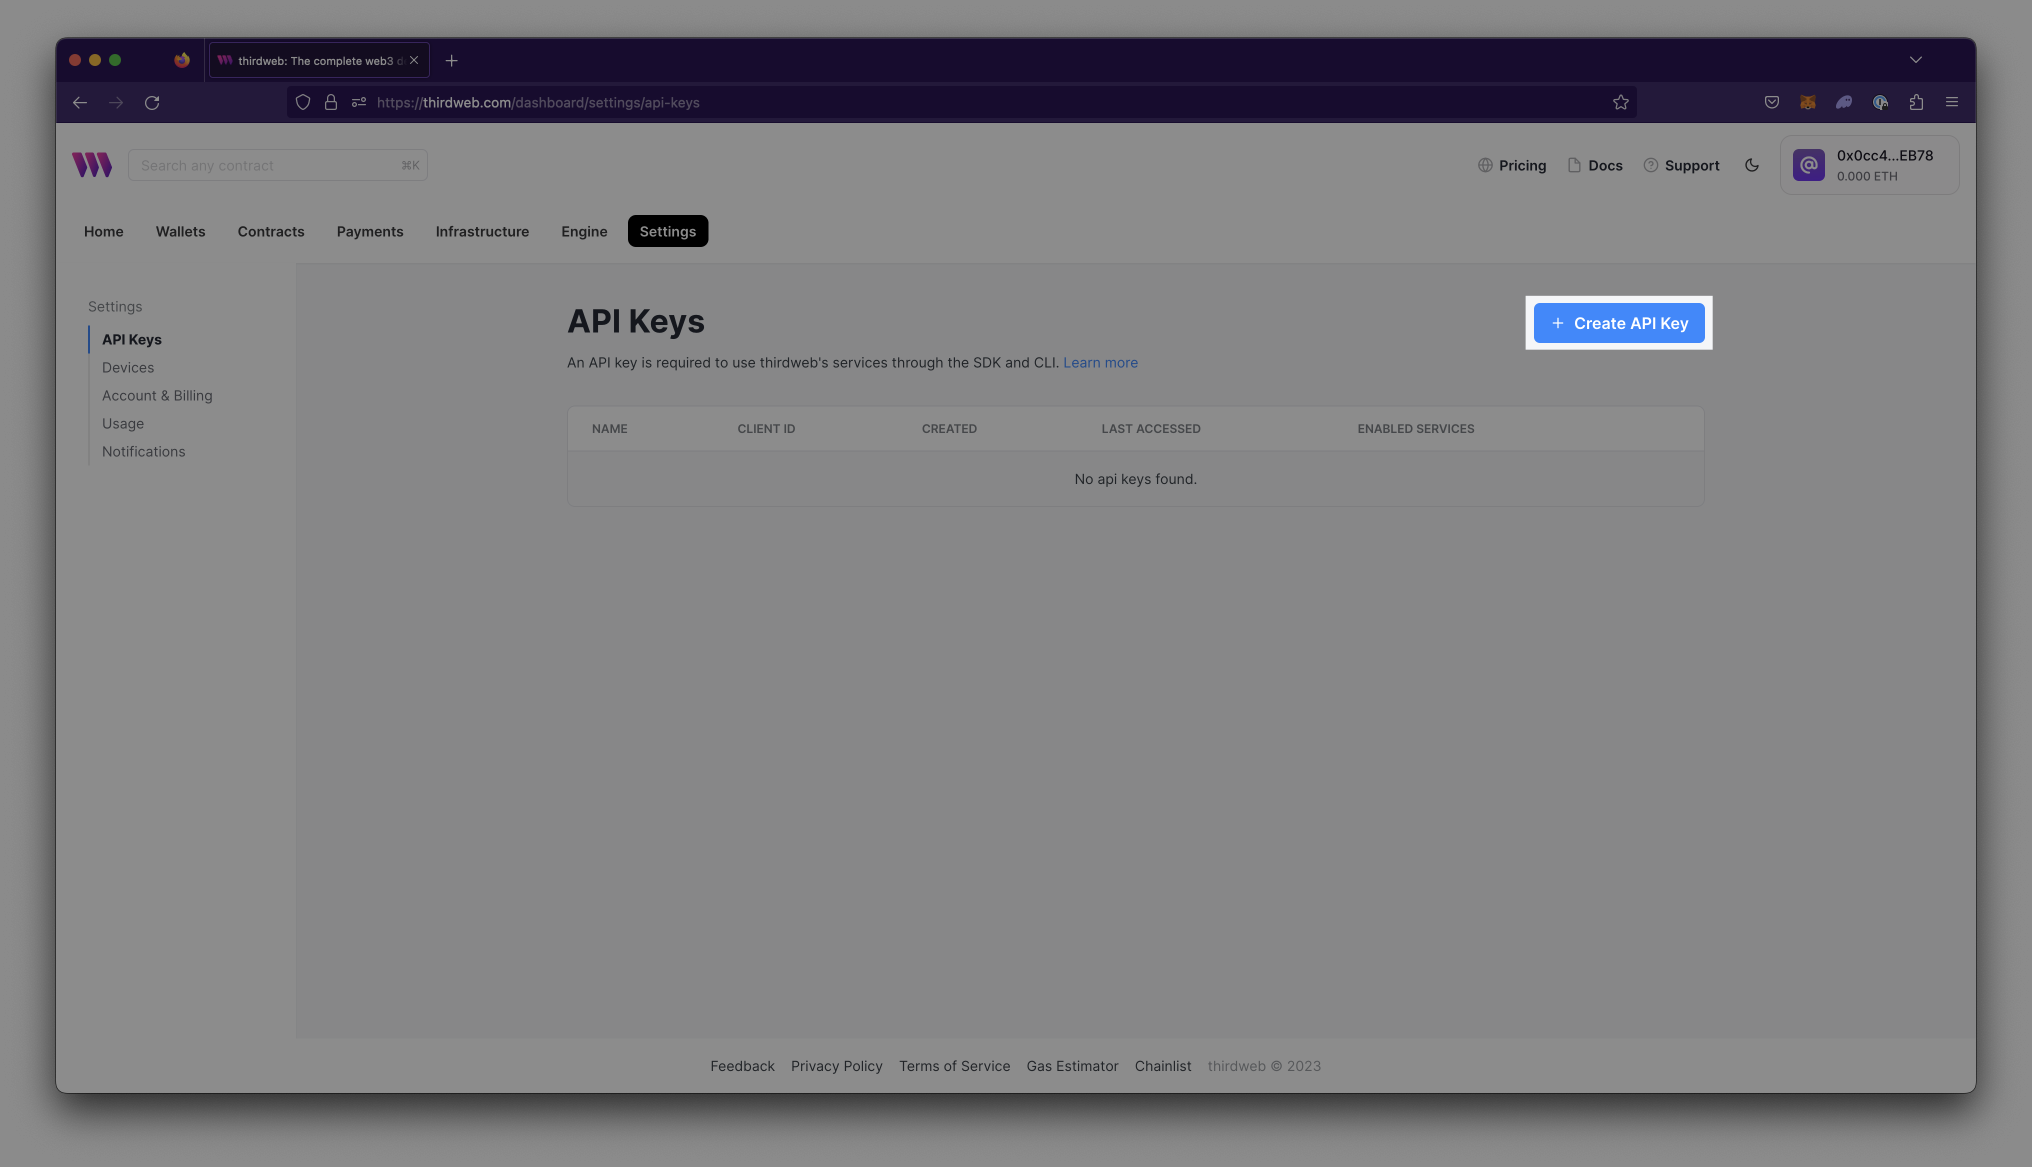
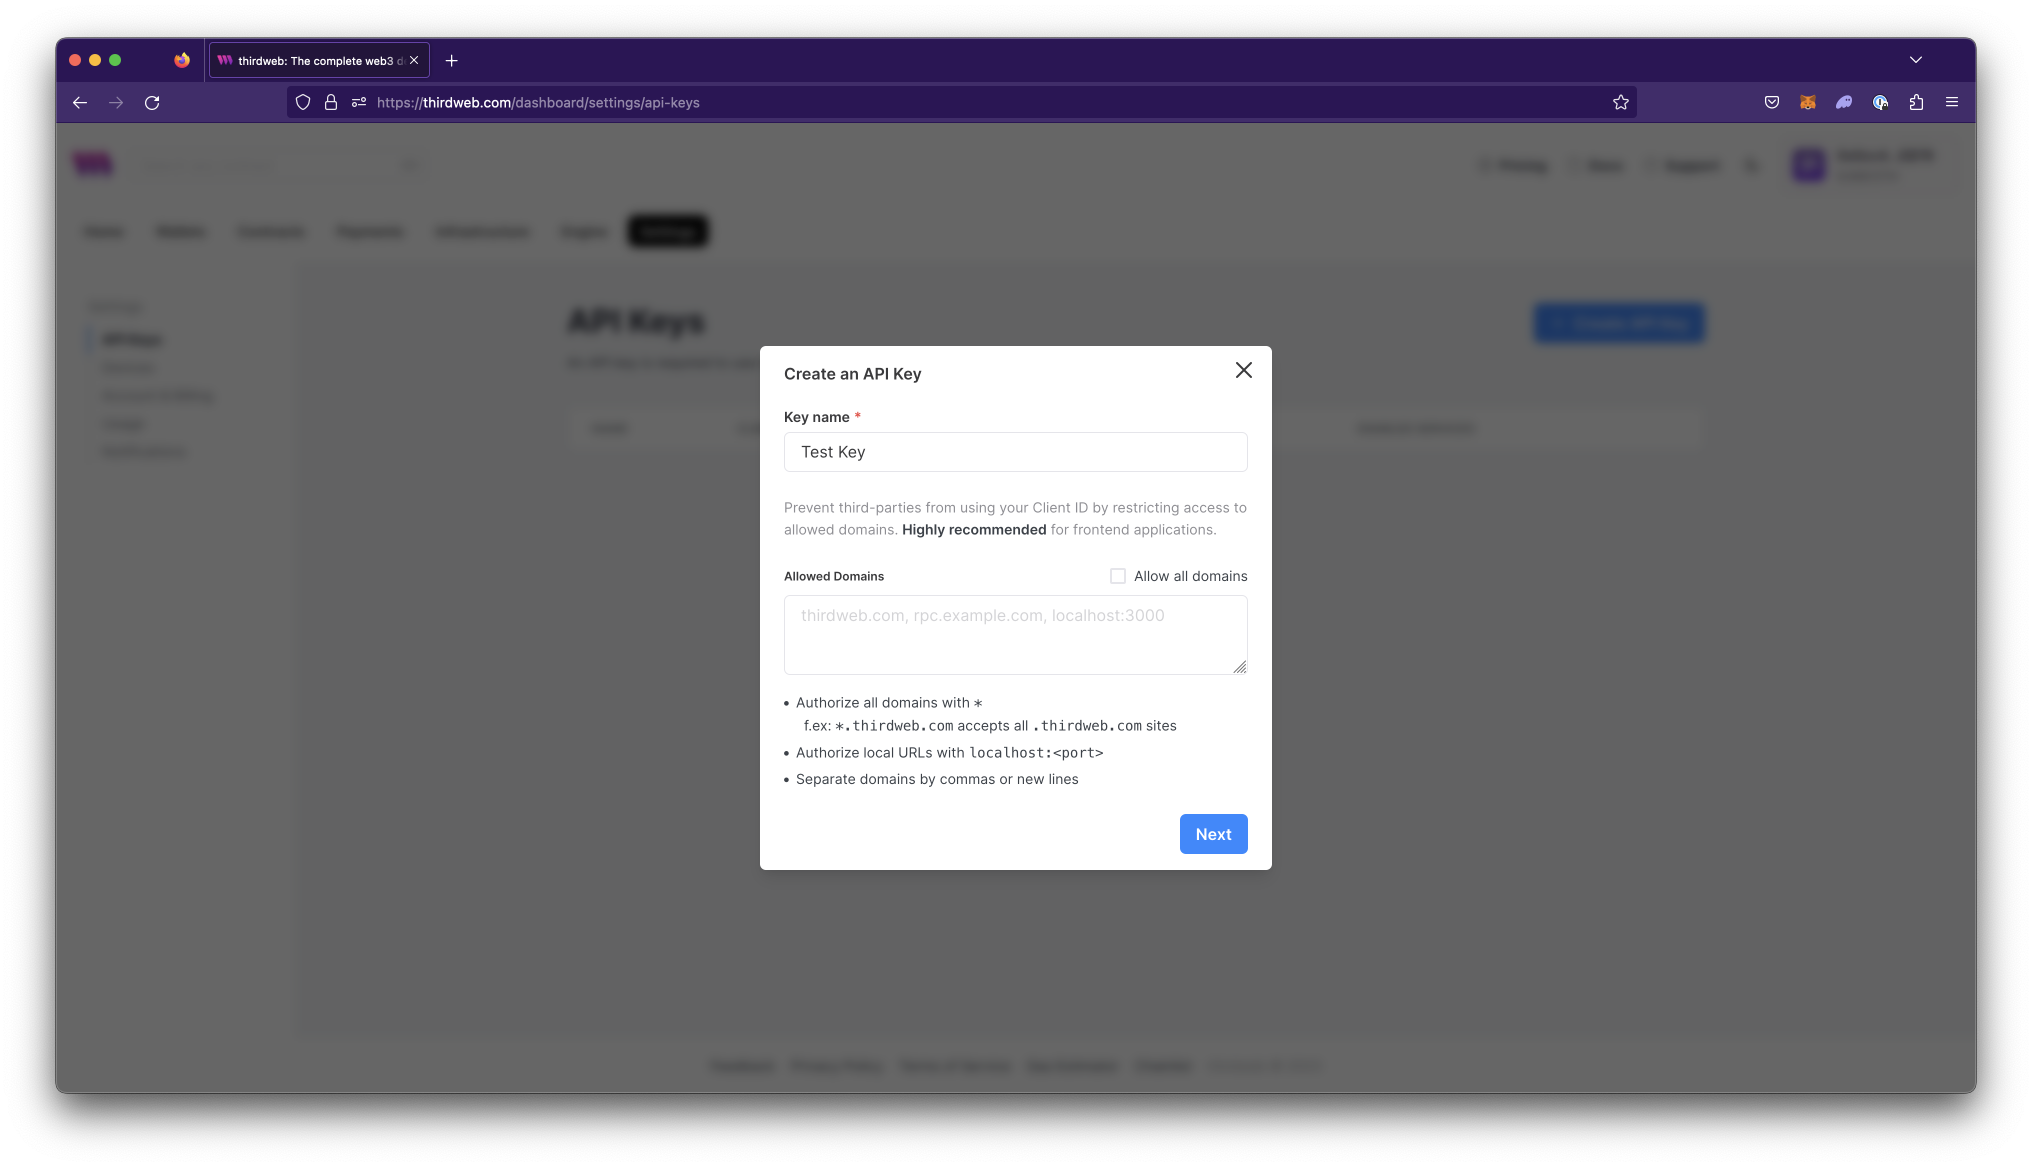
Assign a descriptive name to the API Key.
Input the domains you want to restrict your application to in Allowed Domains then select Next. Restricting domains is highly recommended for any applications with client-side code or frontend applications.
- Authorize all domains by selecting the checkbox or inputting
*into the text field - Authorize local URLs with
localhost:<port>
- Authorize all domains by selecting the checkbox or inputting
Store your secret key in a secure location and confirm that you have stored it by checking the checkbox then select Complete.
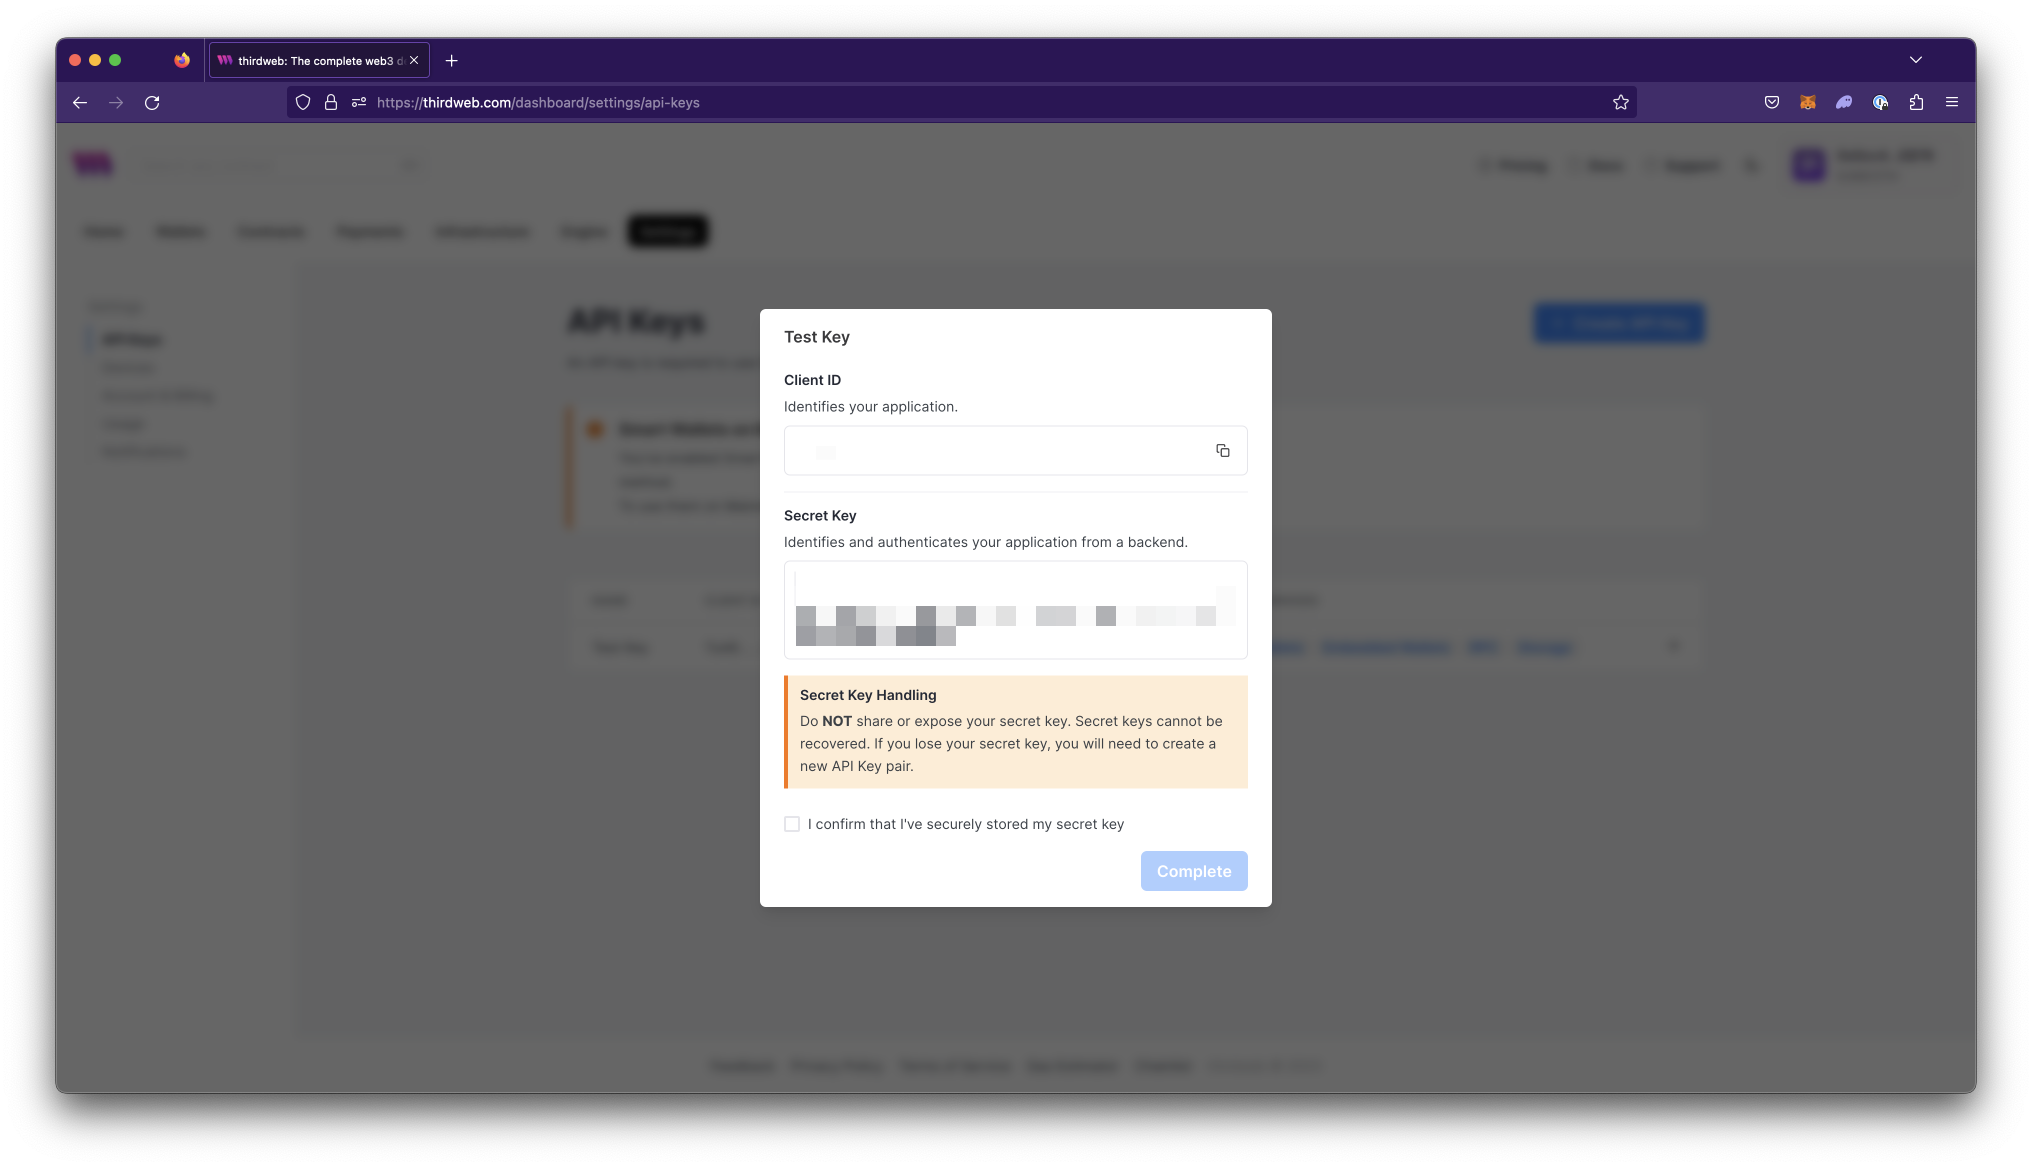 danger
Do not share secret keys. They grant access to all thirdweb services. Secret keys should only be used in backend environments like CLI, scripts, and servers. Never expose secret keys in client-side code due to the lack of access restrictions.**
Edit enabled services on API Keys
All services on API keys are enabled by default. If you want to disable any services or edit settings for each service:
Navigate to Settings > API Keys on the dashboard.
Choose the API Key from which you want to enable or disable a Service.
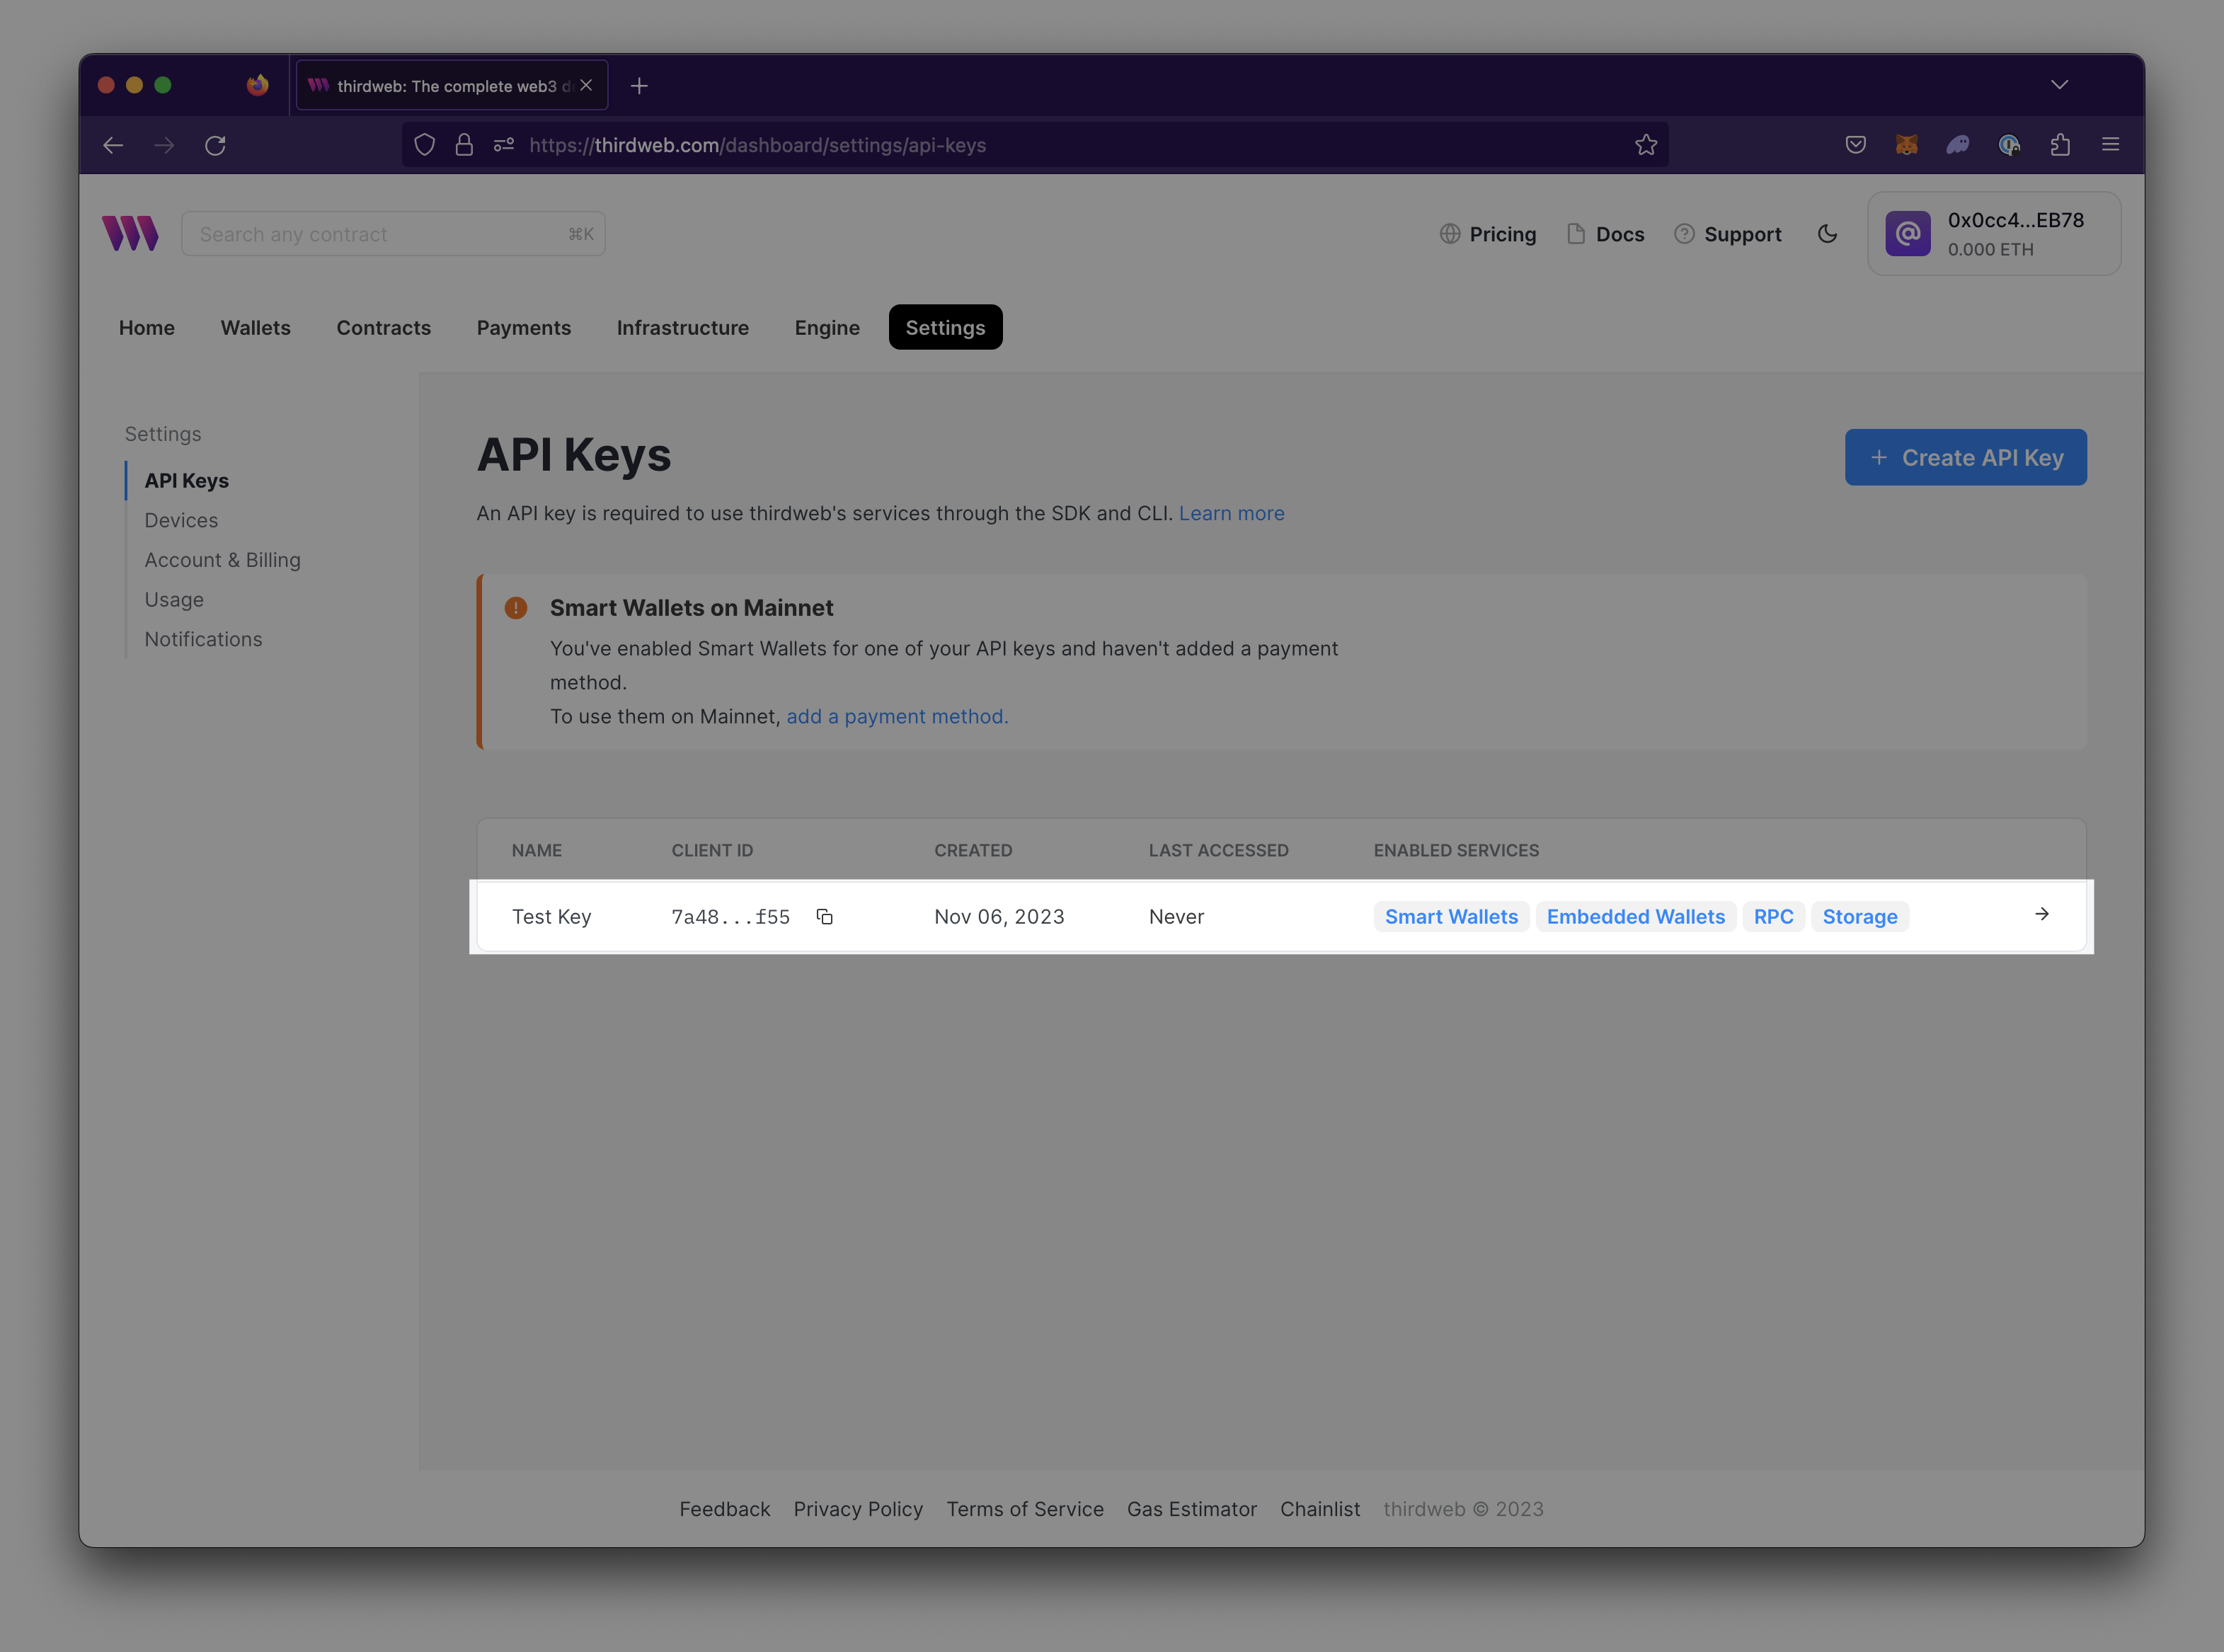
Select
Editto enter the editor view.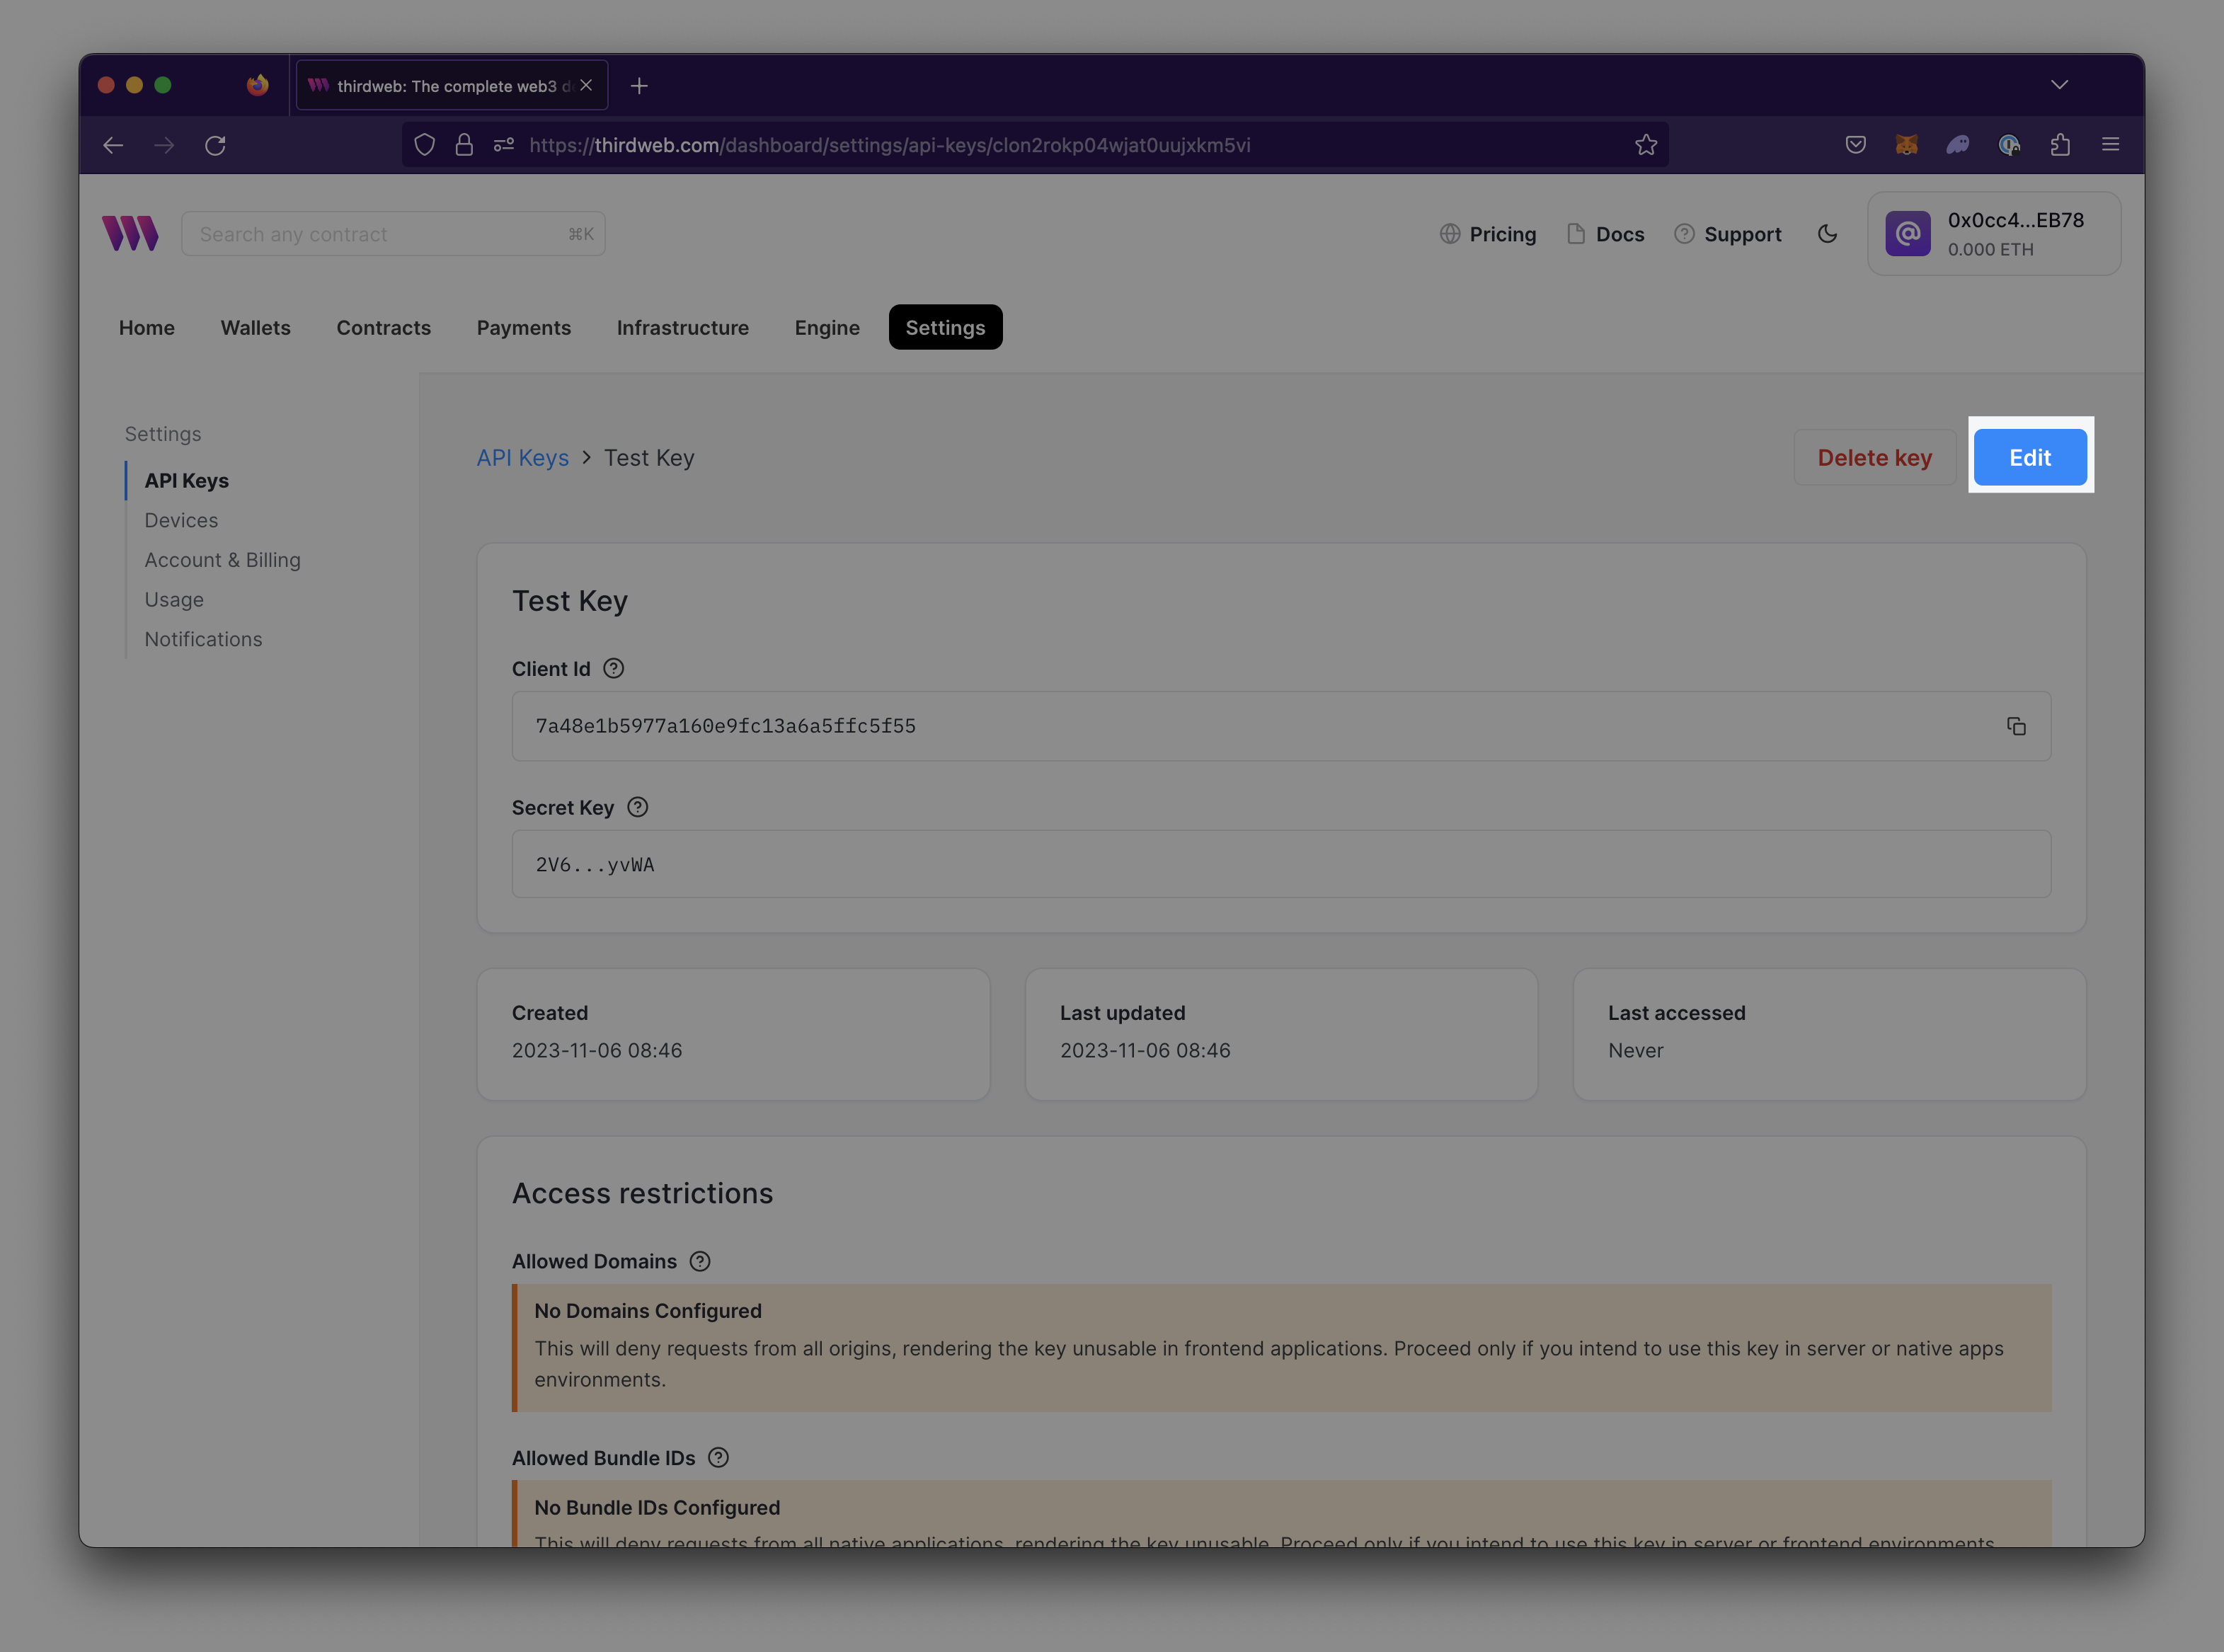
Navigate to the Services section and enable the service and modify any services as needed.
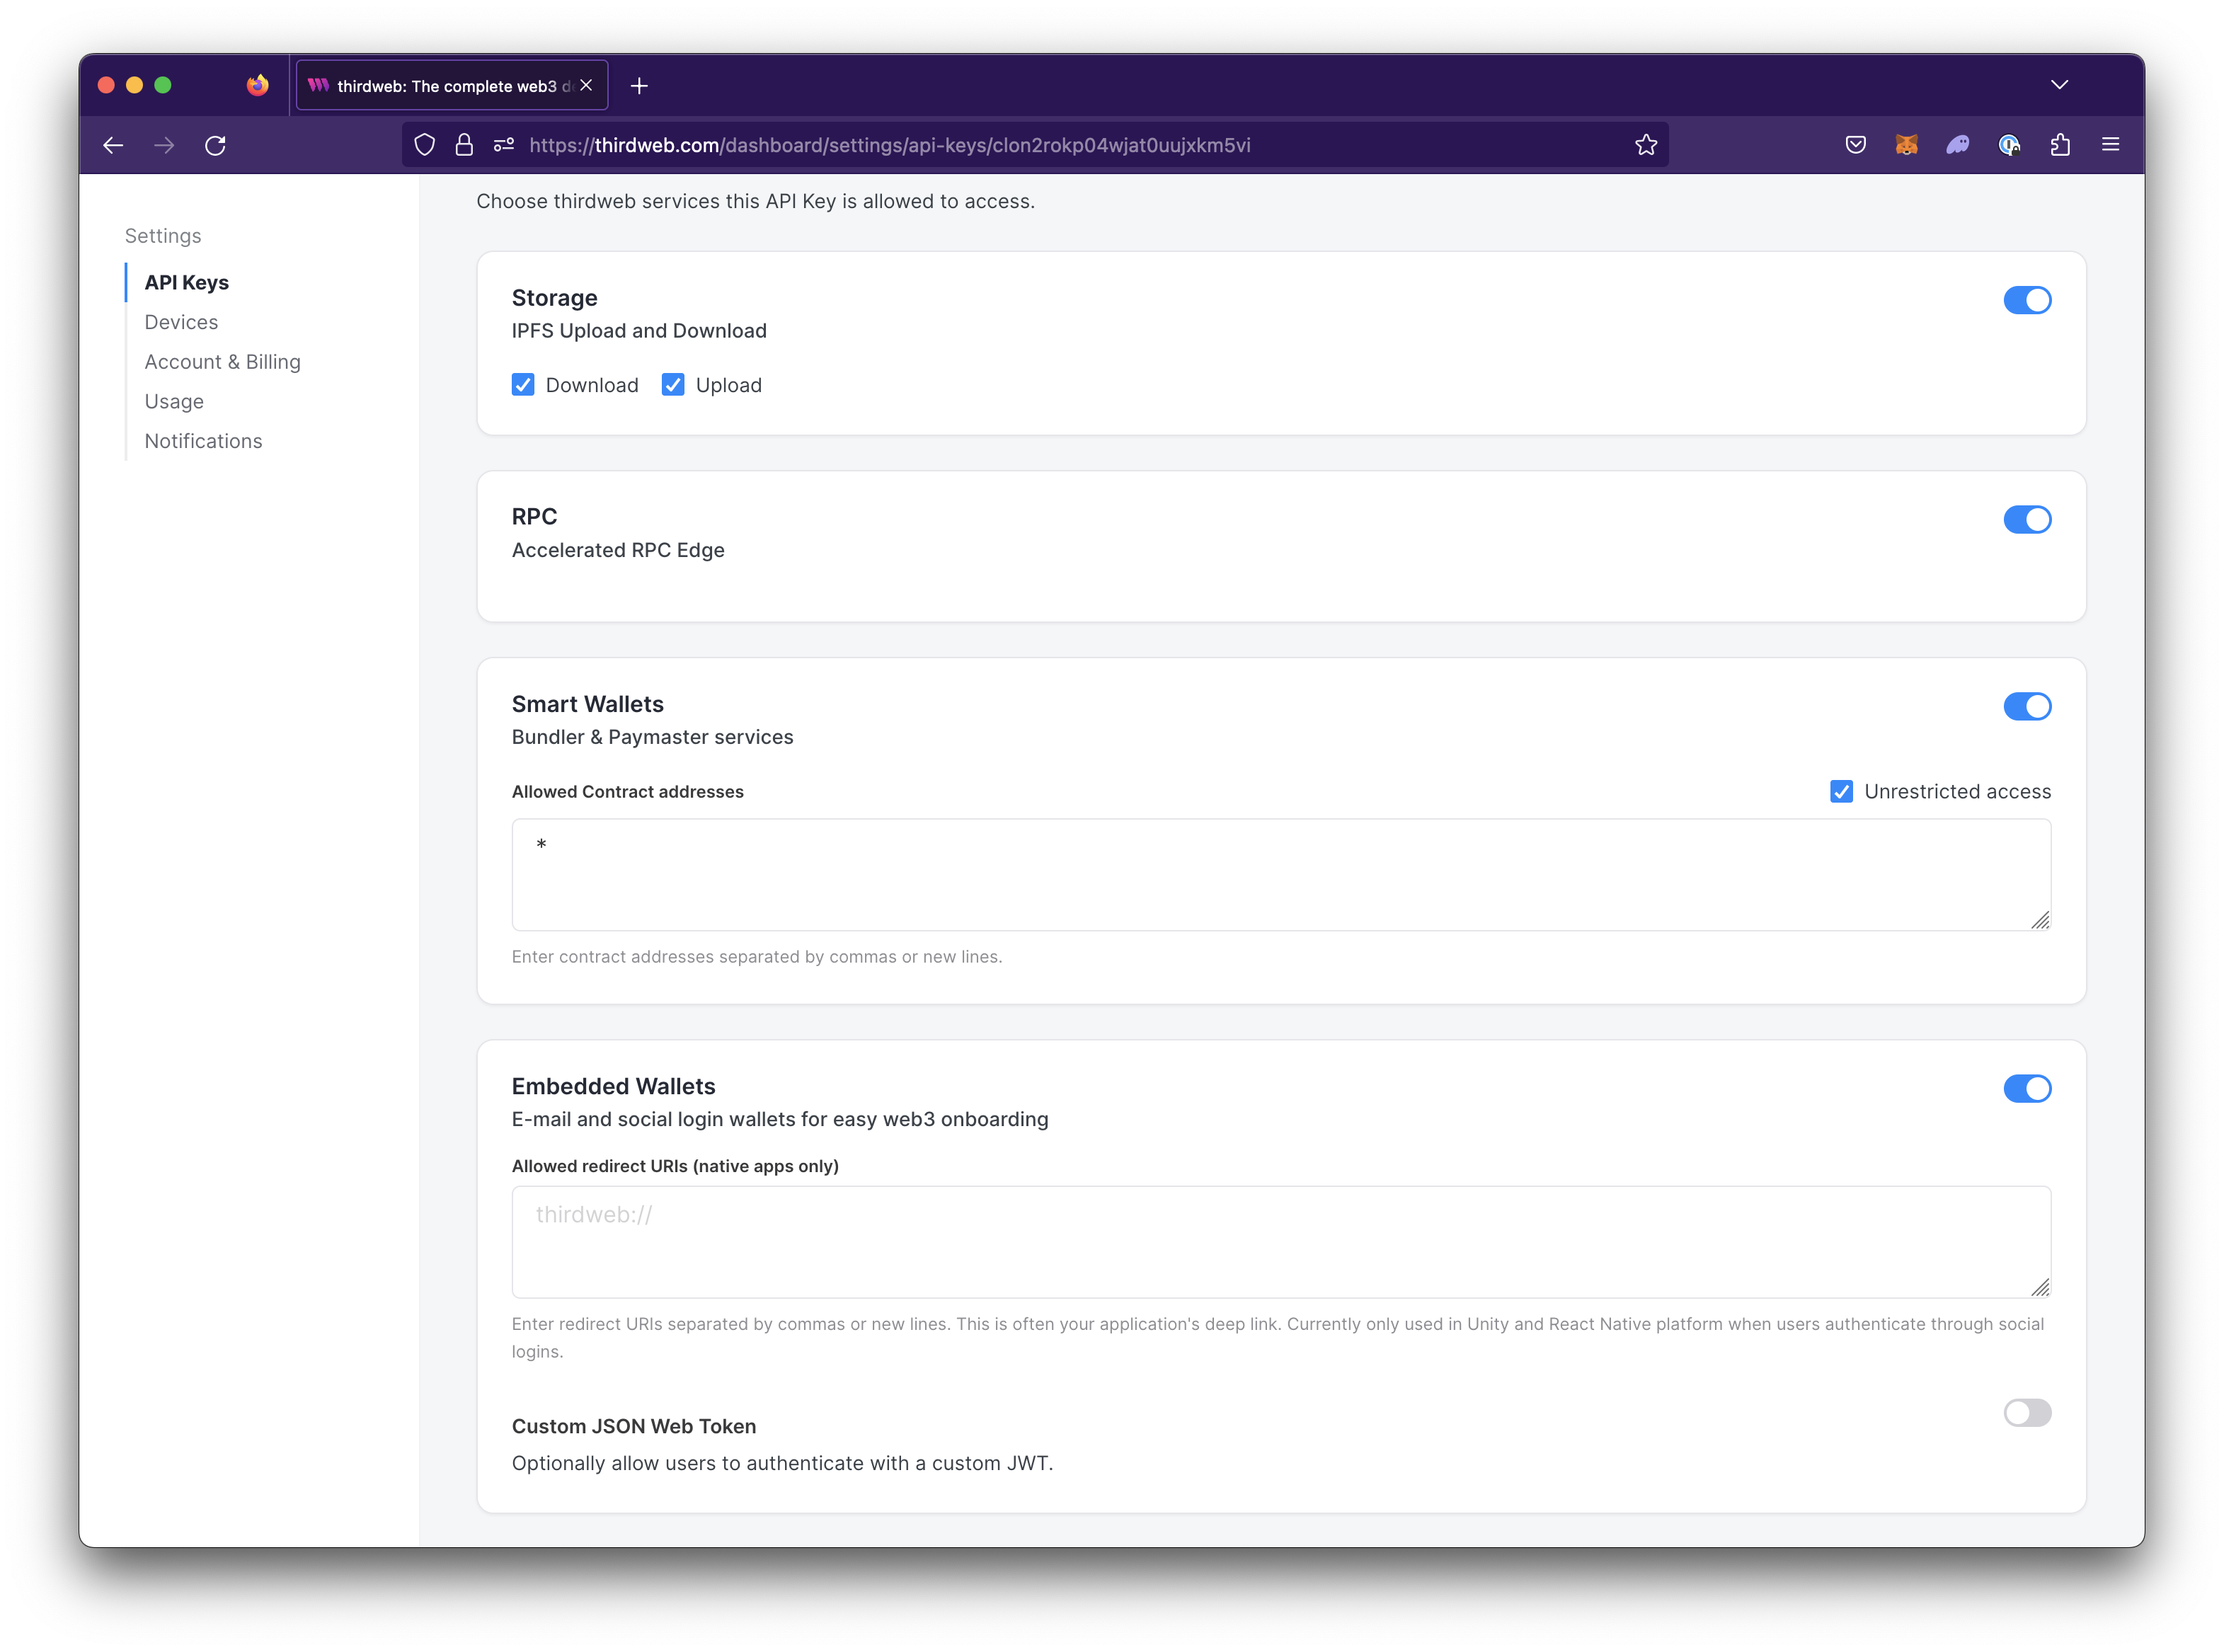
Save changes.
Use API keys in your application
- Typescript
- React
- Unity
- Python
- GO
When writing backends or scripts, you can use the secret key to instantiate the SDK:
// Read-only mode
const readOnlySdk = new ThirdwebSDK("goerli", {
  secretKey: "YOUR_SECRET_KEY", // Use secret key if using on the server, get it from dashboard settings
});
When using the Typescript SDK for frontend applications, use the client id:
import { ThirdwebSDK } from "@thirdweb-dev/sdk";
// Read-only mode
const readOnlySdk = new ThirdwebSDK("goerli", {
  clientId: "YOUR_CLIENT_ID", // Use client id if using on the client side, get it from dashboard settings
});
When using the React SDK, you can use the client id to instantiate the SDK:
import { ThirdwebProvider } from "@thirdweb-dev/react";

function MyApp() {
  return (
    <ThirdwebProvider
      activeChain="ethereum"
      clientId="your-client-id"
    >
      <YourApp />
    </ThirdwebProvider>
  );
}
When using the Unity SDK, you can use the client id to instantiate the SDK:
  ThirdwebSDK sdk = new ThirdwebSDK("goerli", 5, new ThirdwebSDK.Options()
  {
    clientId = "my-client-id", // you can get client id from dashboard settings
  });
When using the Python SDK, you can use the secret key to instantiate the SDK:
  from thirdweb import ThirdwebSDK
  from thirdweb.types import SDKOptions
  from dotenv.main import load_dotenv
  import os

    load_dotenv()
    secret_key = os.environ['SECRET_KEY']
    private_key = os.environ['PRIVATE_KEY']

    sdk = ThirdwebSDK.from_private_key(private_key, "mumbai", SDKOptions(secret_key=secret_key))
When using the GO SDK, you can use the secret key to instantiate the SDK:
  package main

  import (
        "fmt"

        "github.com/thirdweb-dev/go-sdk/v2/thirdweb"
  )

  func main() {
        // Your secret key from the thirdweb api keys dashboard
        secretKey := "..."

        // Creates a new SDK instance to get read-only data for your contracts, you can pass:
        // - a chain name (mainnet, rinkeby, goerli, polygon, mumbai, avalanche, fantom)
        // - a custom RPC URL
        sdk, err := thirdweb.NewThirdwebSDK("mumbai", &thirdweb.SDKOptions{
            SecretKey: secretKey,
        })
        if err != nil {
            panic(err)
    }

        // Now we can interact with the SDK, like displaying the connected chain ID
        chainId, err := sdk.GetChainID()
        if err != nil {
            panic(err)
        }

        fmt.Println("New SDK instance create on chain", chainId)
  }
Delete an API Key
To delete an API key:
Navigate to Settings > API Keys on the dashboard.
Choose the API Key you want to delete.

To delete an API key, select
Delete keyand confirm your intention to delete the key. The key will then be deleted.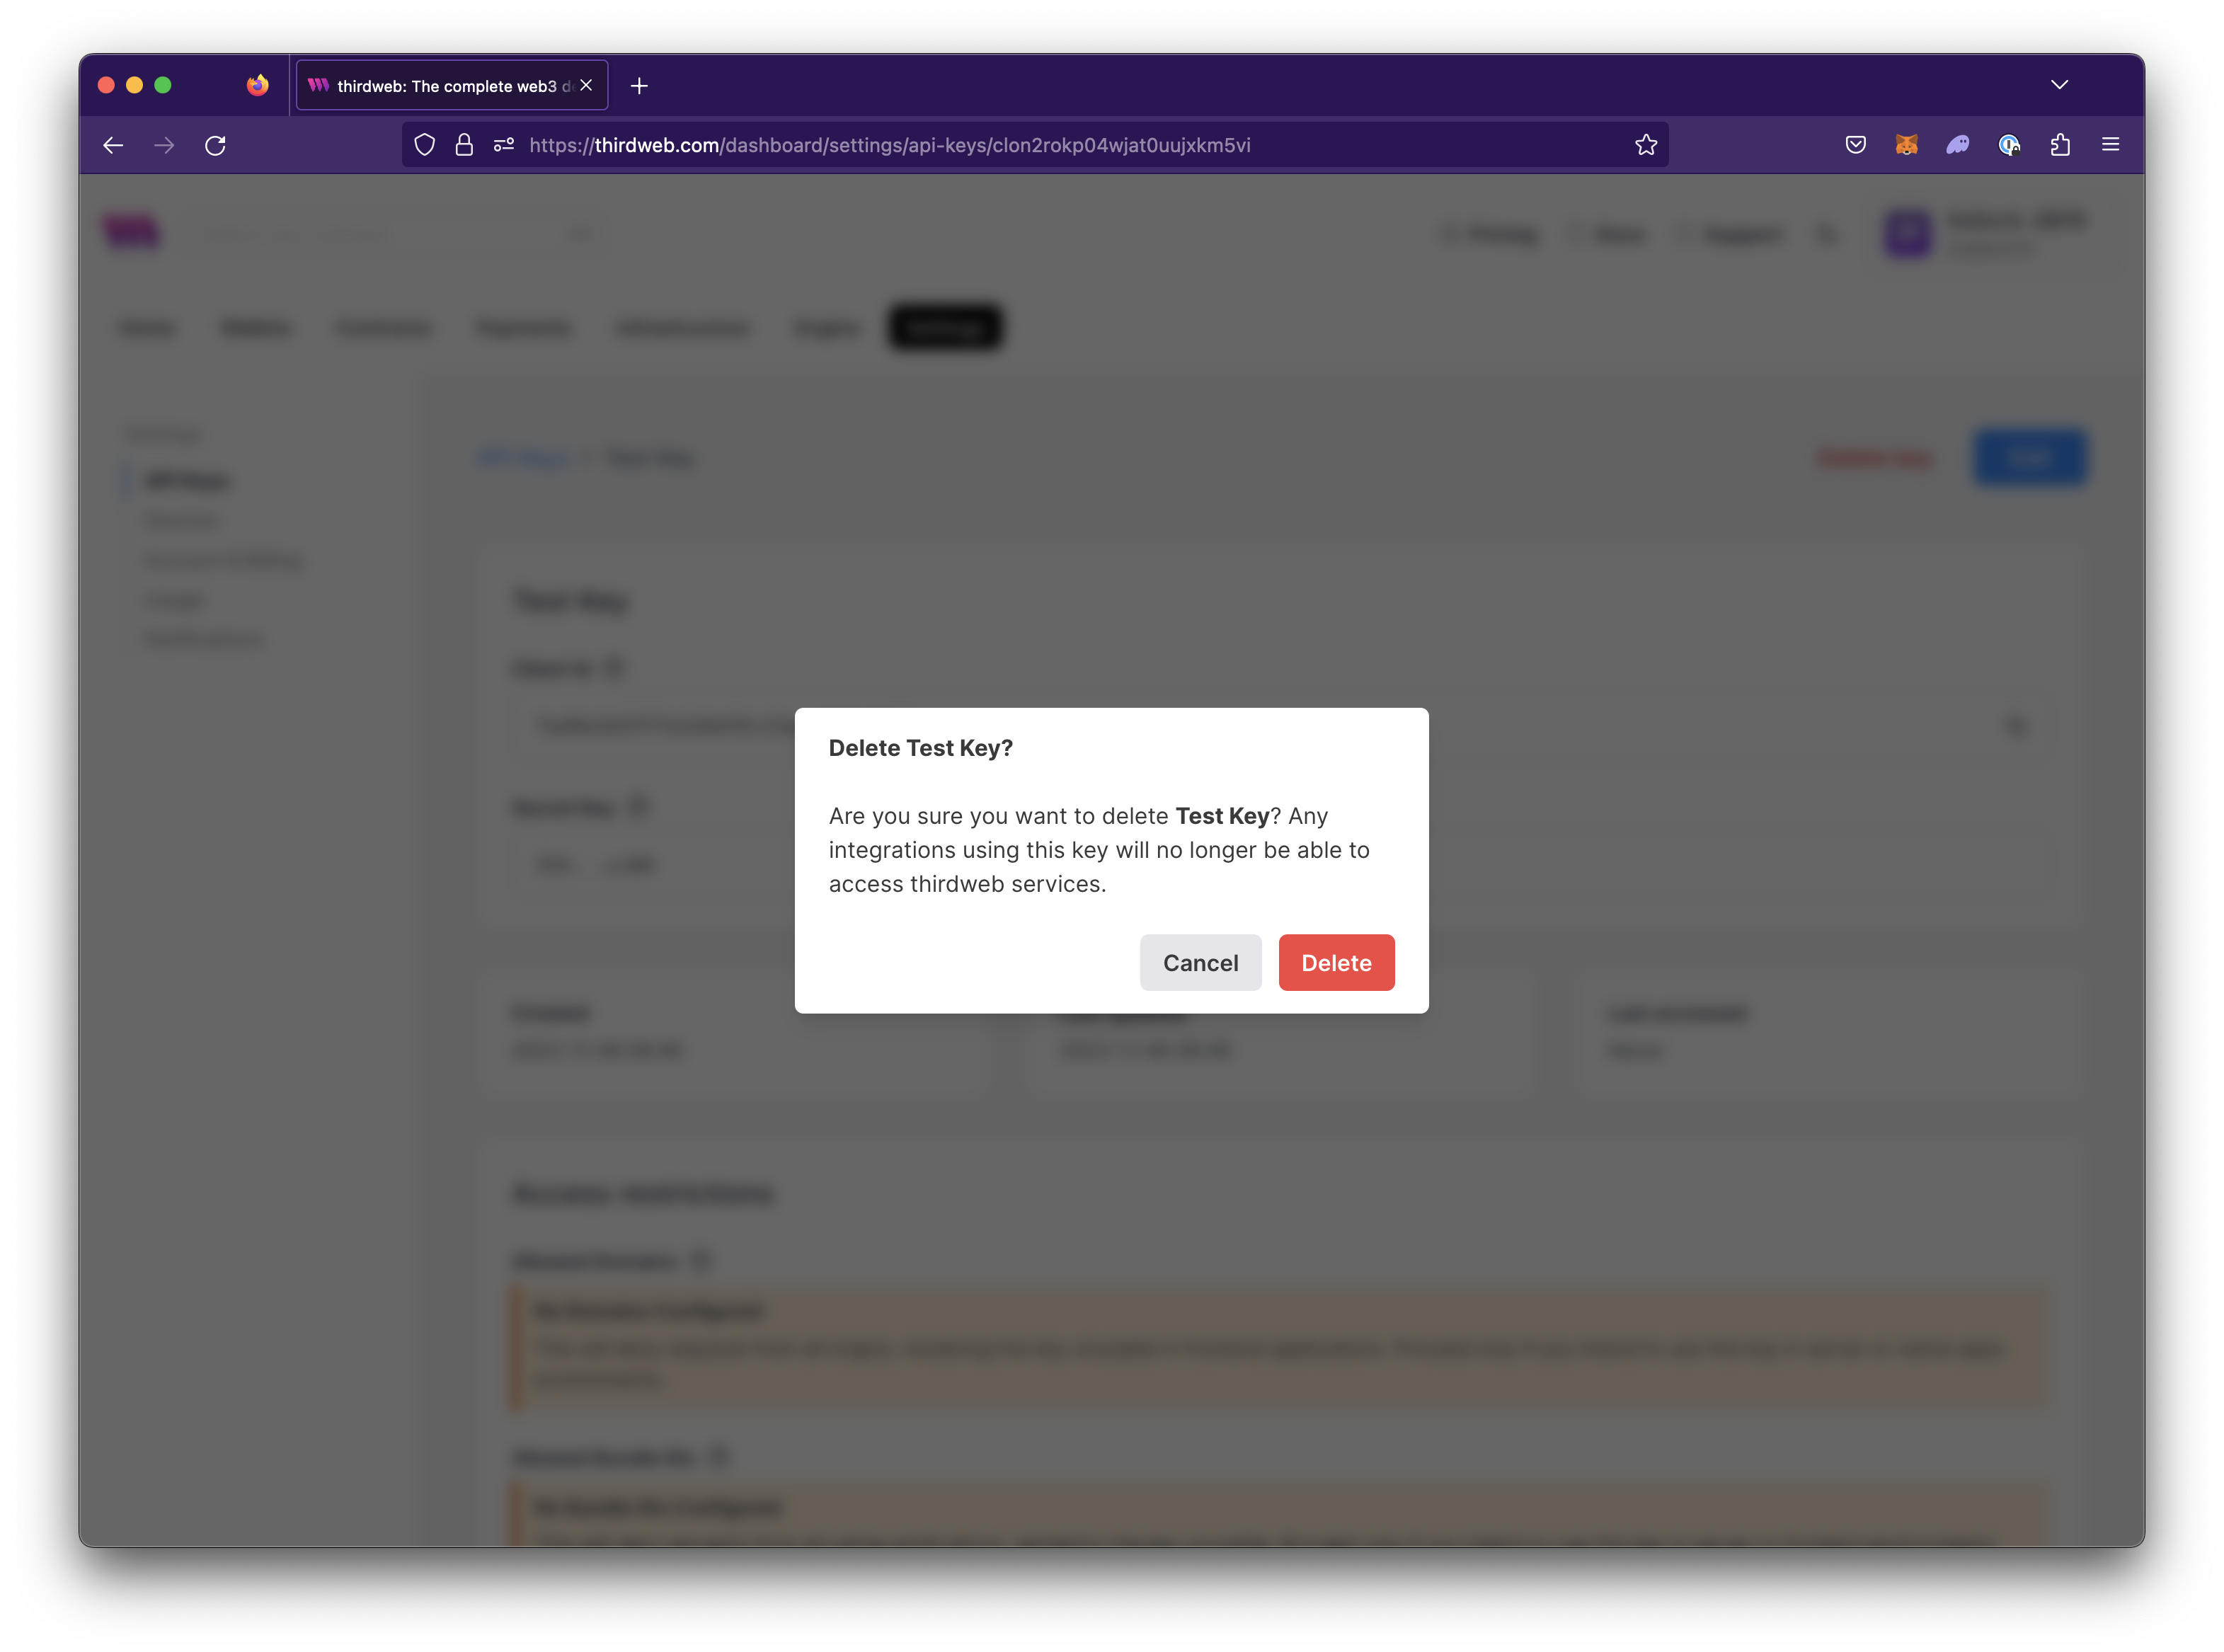
Deleting an API key will invalidate it, making it no longer usable.
Access Restrictions
API Keys provide two forms of access restrictions:
- Domain IDs: A domain ID is used to restrict access to the enabled thirdweb infrastructure services based on a specific domain. It serves as an identifier for websites.
- Bundle IDs: A bundle ID is a unique identifier used to restrict the Client ID to your Unity native or mobile application.
To modify the allowed Domain Id or Bundle Ids:
Navigate to Settings > API Keys on the dashboard.
Choose the API Key you want to modify restrictions on.

Select
Editto enter editor mode.
Enter the allowed domains the "Allowed Domains" field or switch to Bundle IDs to enter allowed Bundle IDs.
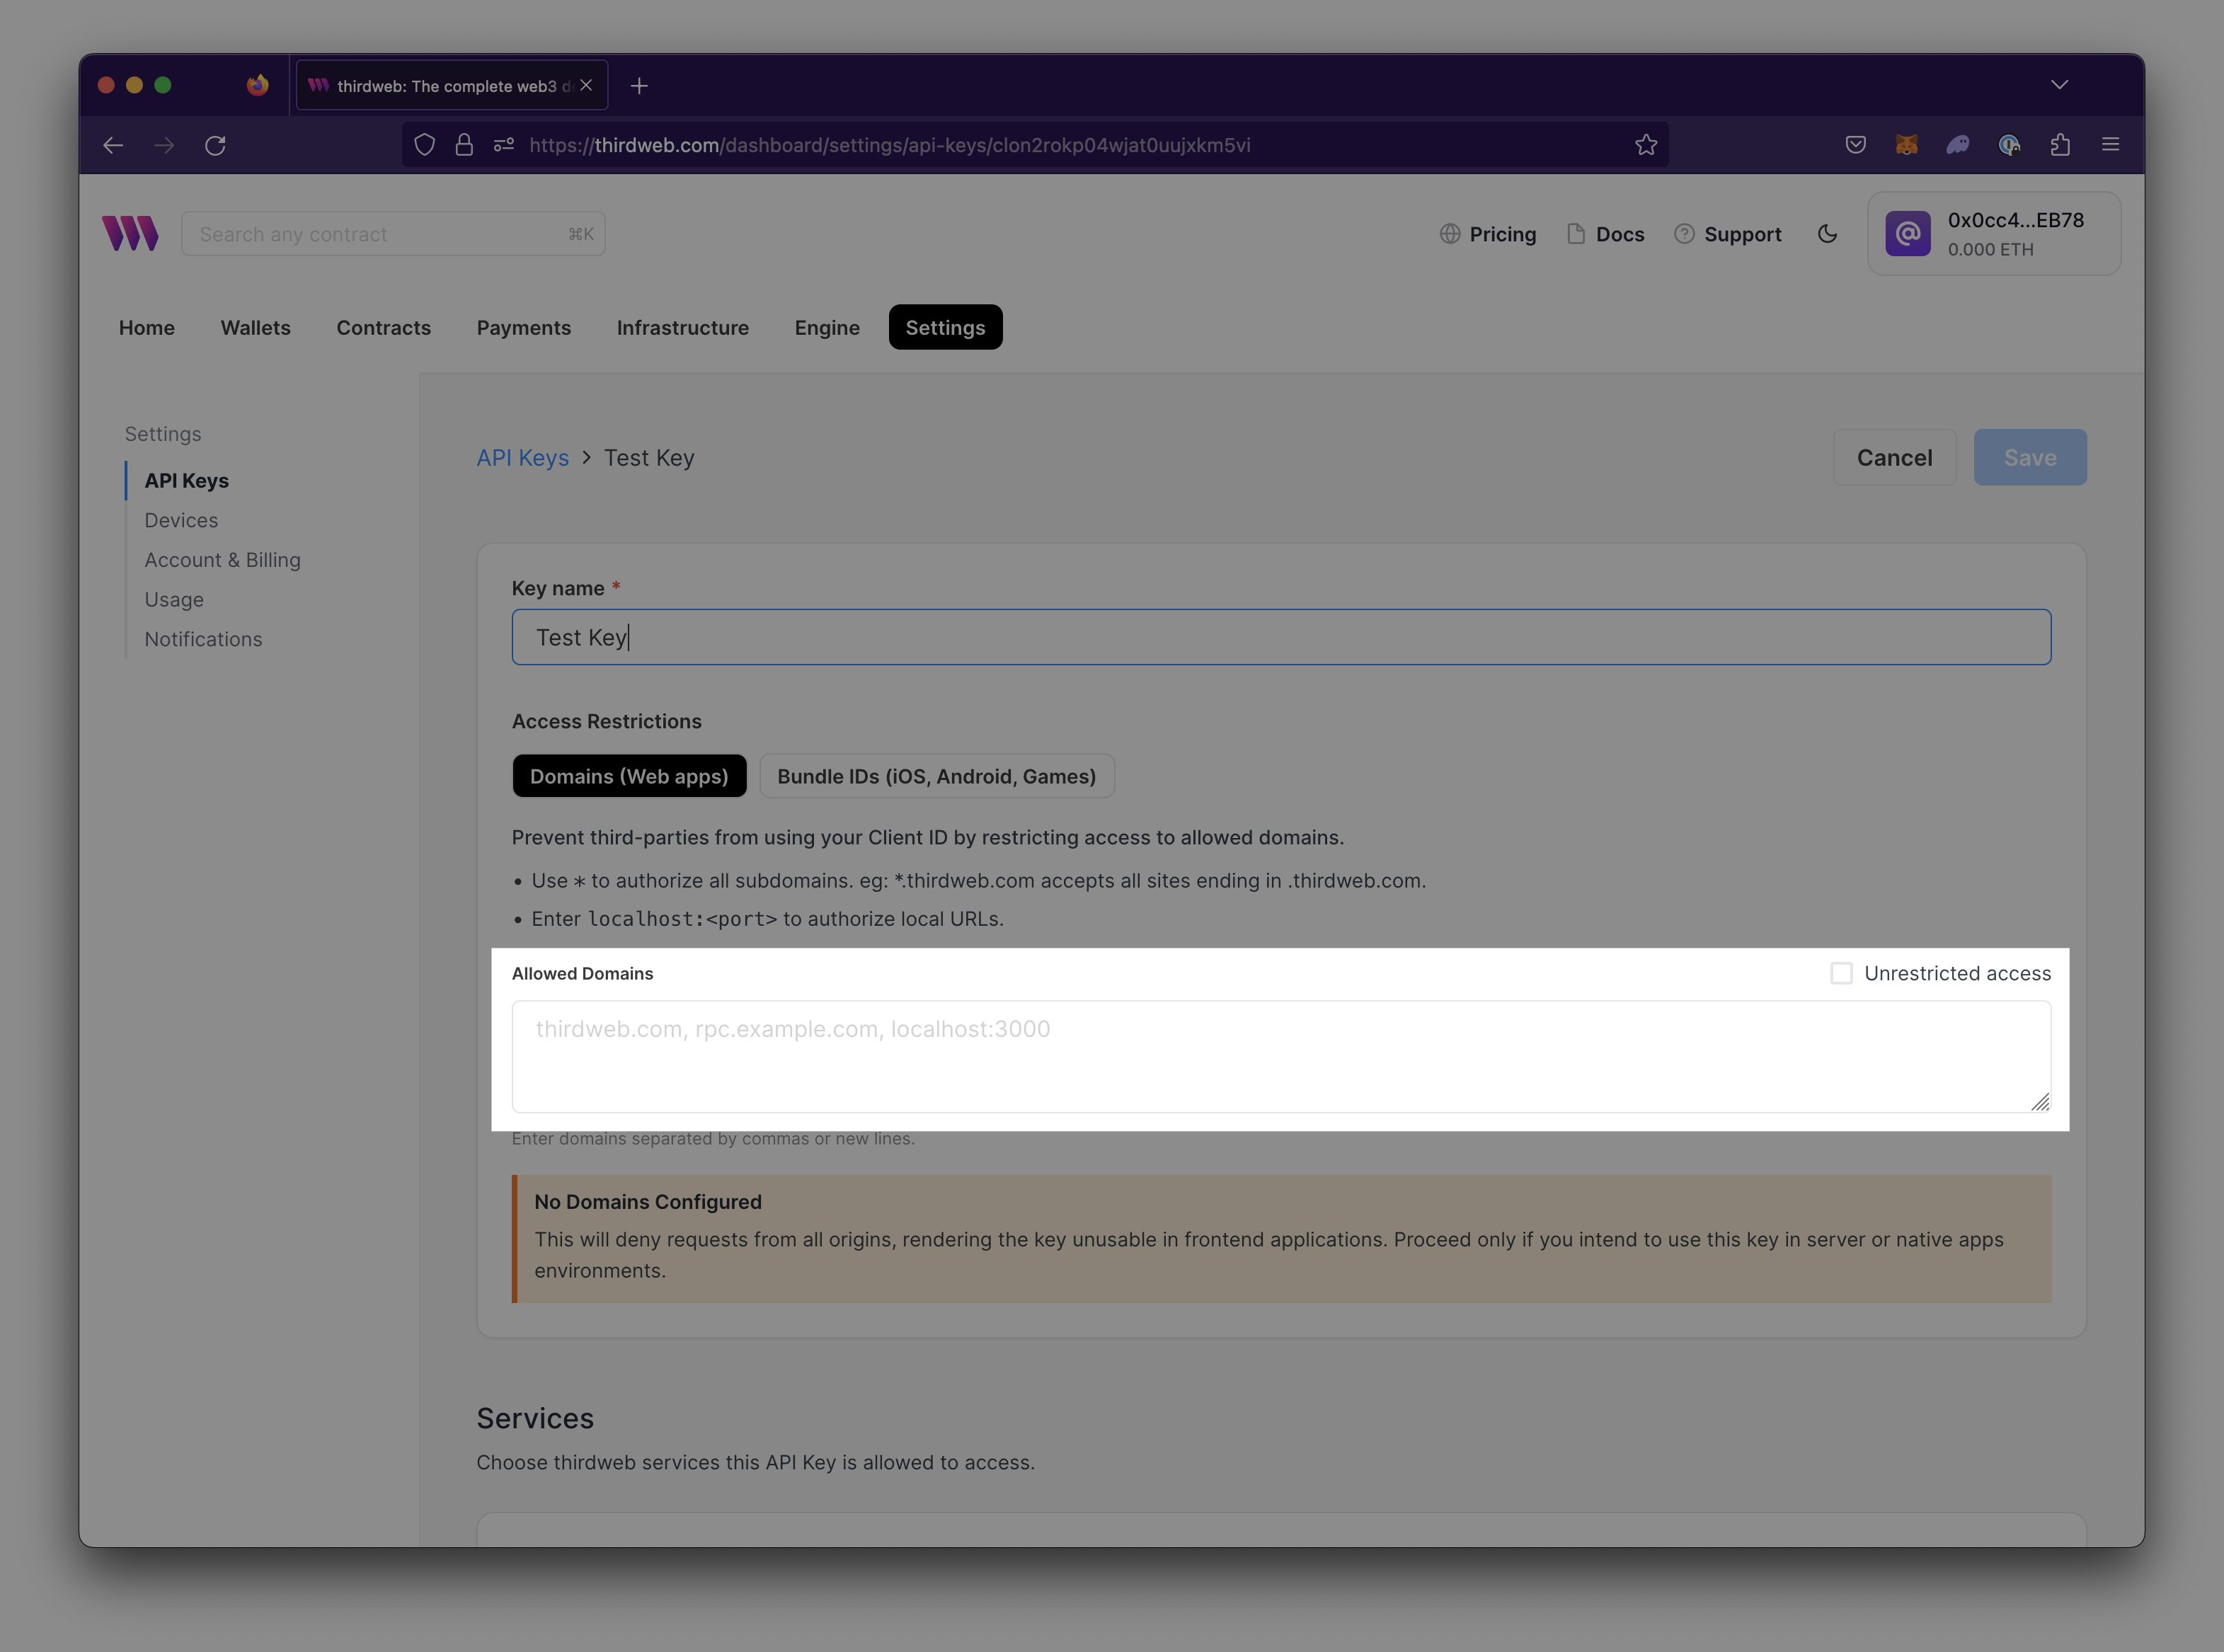
Save changes.
Services
Storage
By default, Storage services are enabled upon creation of the API Key.
Storage provides two sub-settings enabled by default on API Key creation.
- Upload - Enable uploading to Storage
- Download - Enable downloading from Storage
To disable Upload or Download:
- Navigate to Settings > API Keys
- Toggle the checkboxes in the Services > Storage settings
RPC Edge
By default, RPC Edge services are enabled upon creation of the API Key.
To use RPC Edge in your application, see our RPC Edge QuickStart article.
Smart Wallets
By default, Smart Wallet services are enabled upon creation of the API Key.
Smart Wallet Destination Address A smart wallet destination address is allowed to send transactions to or interact with. These addresses can be smart contracts, EOAs (Externally Owned Accounts), or other smart wallet addresses. This feature is useful for restricting the smart wallet to only send transactions to your own contracts.
To restrict the contracts that Smart Wallet can interact with:
Navigate to Settings > API Keys
Locate Smart Wallet under Services
Input the contract address(es) into the 'Allowed Contract Addresses' field.
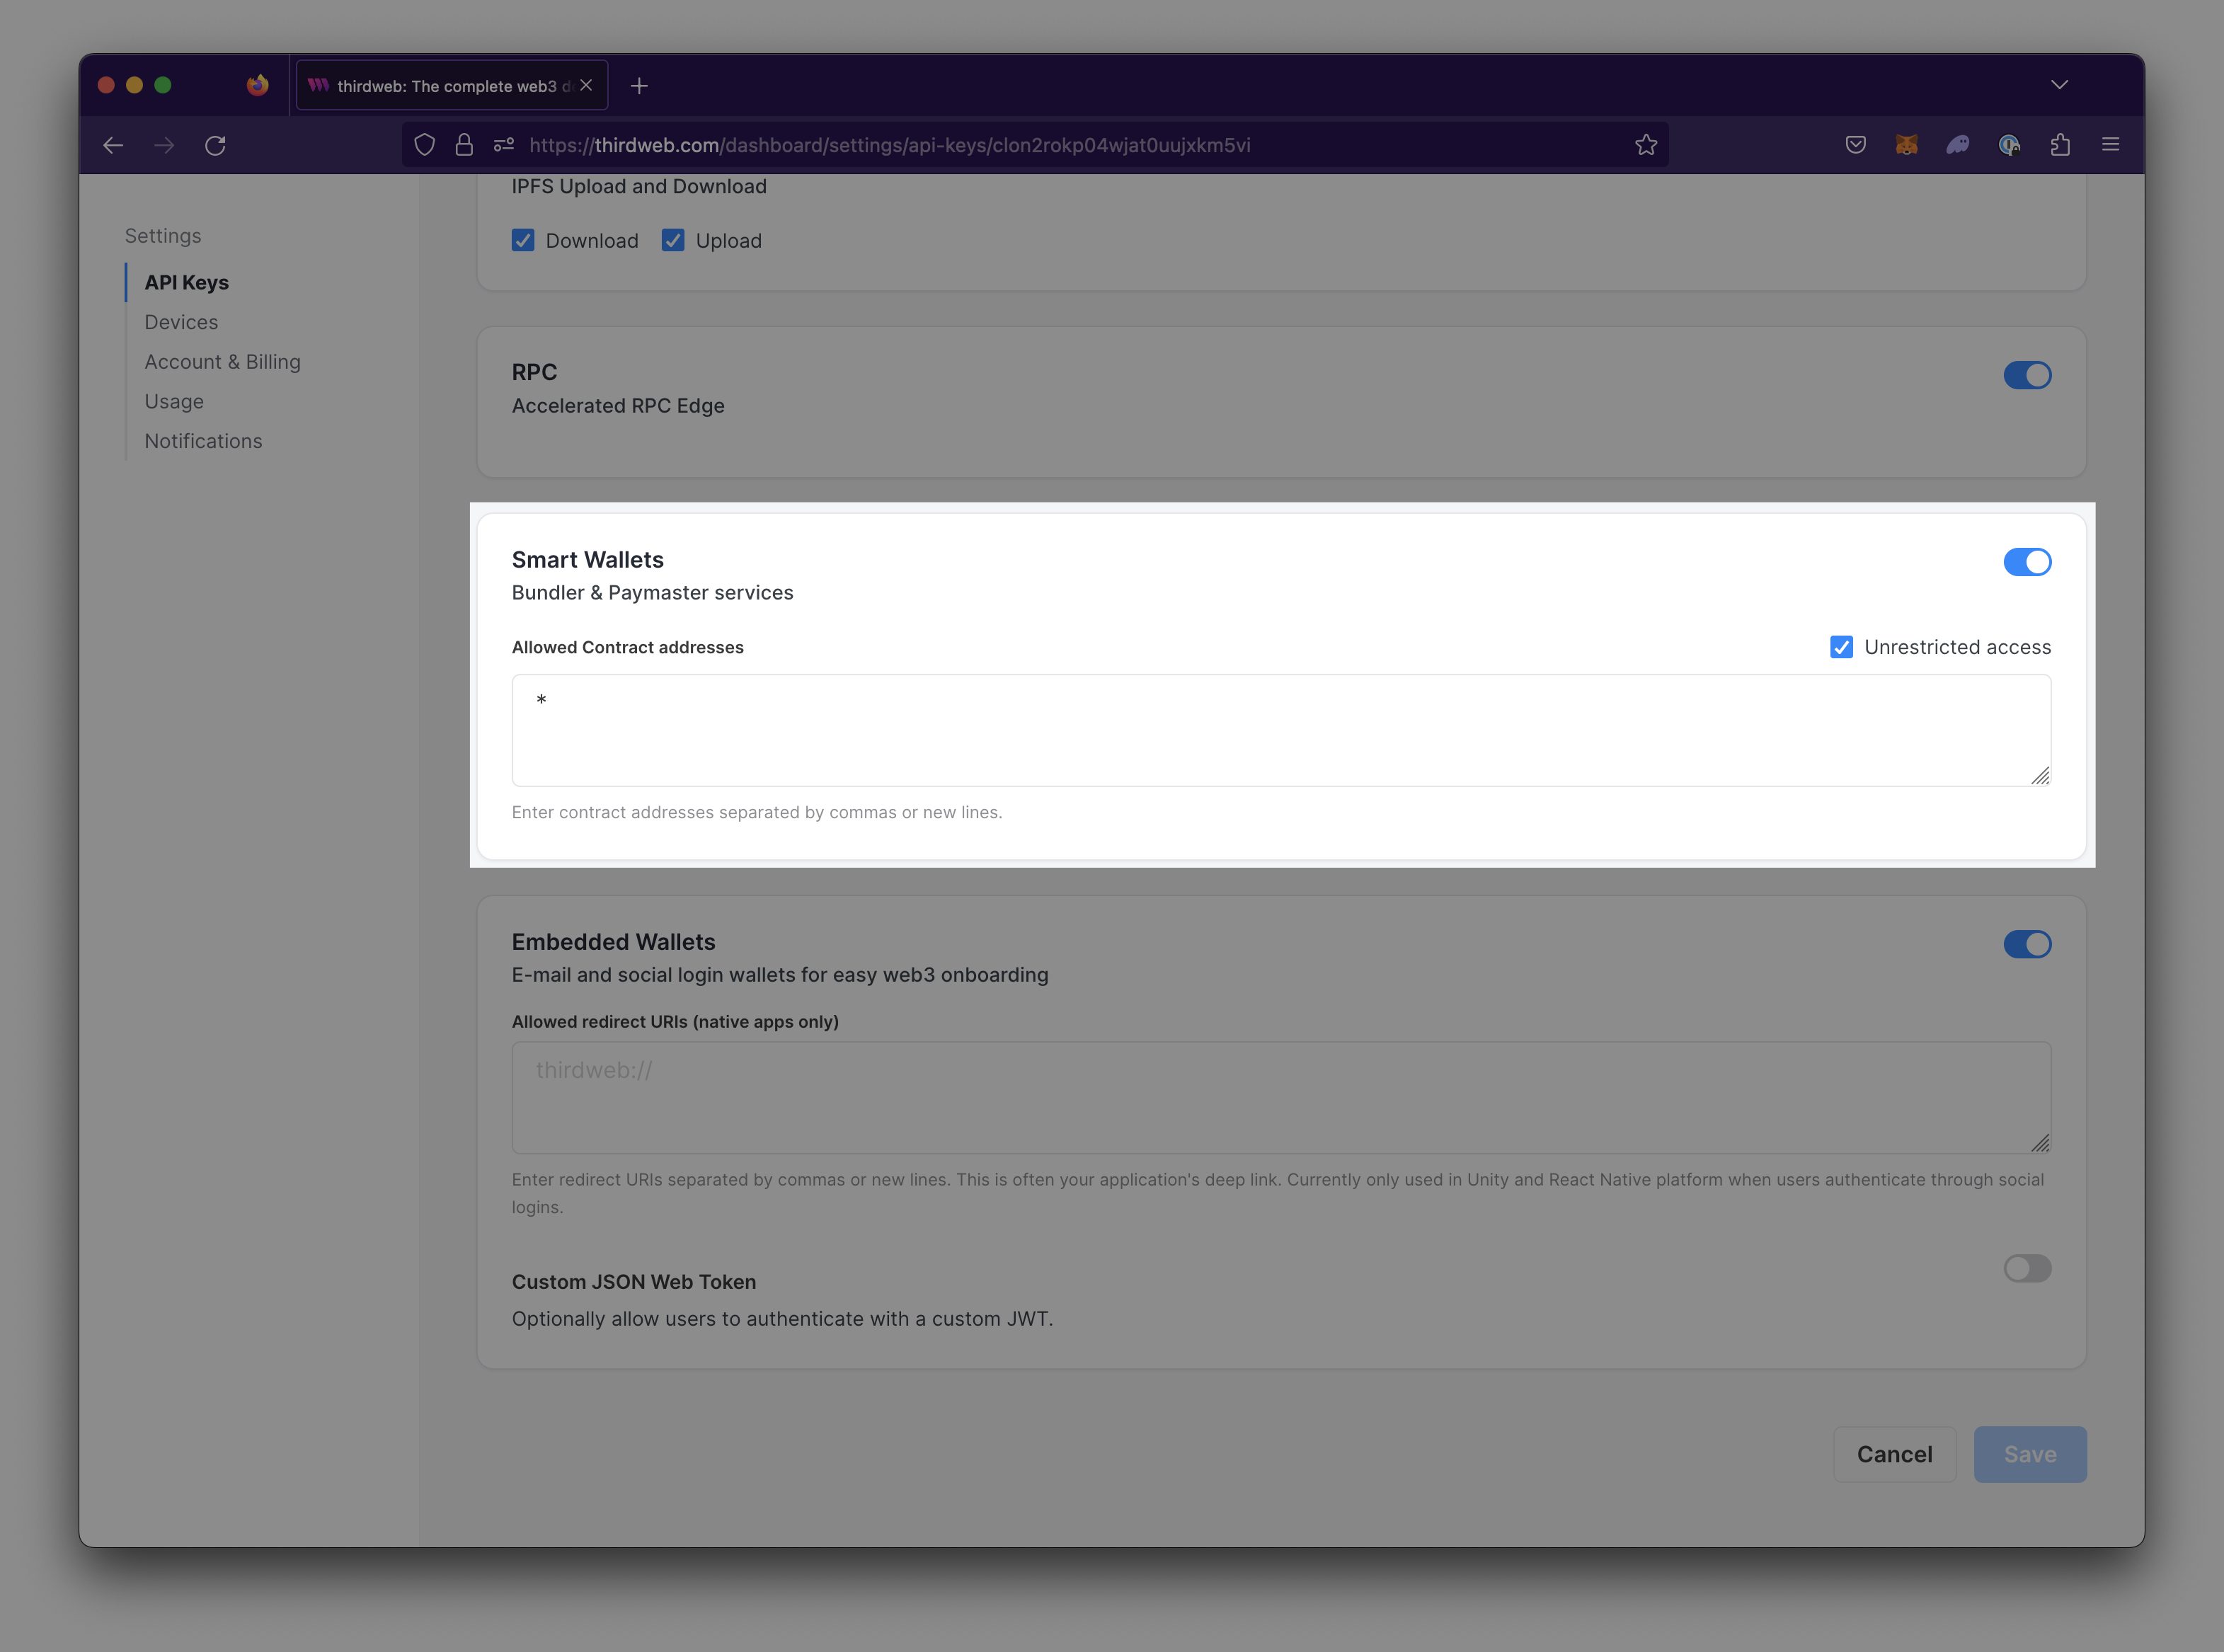
Save your new settings by selecting
Save
Embedded Wallets
By default, Embedded Wallet services are enabled upon creation of the API Key.
FAQs
Is the API Key free to use?
Yes, API Keys are free to create and use.
Can I use thirdweb SDKs without an API key?
Yes, you can use thirdweb SDKs without an API key to override the default infrastructure. You will need to provide and pass in your own services to the SDKs.
How do I get my bundle Id for a Unity Native or mobile (React Native) application?
If you are developing a Unity native or mobile application, you will need to obtain a bundleId to restrict the Client ID to your application.
Unity Native, use either of the following options:
- Log
Utils.GetBundleId(). - Check the platform-specific options in your Project Settings. It is usually formatted as
com.companyName.productNamebased on your top-level Project Settings.
- Log
Mobile (React Native)
Android
- Open the file
<Project>/android/app/build.gradleand search for the termapplicationId:android {
defaultConfig {
applicationId "com.example.yourproject"
...
}
}
- Open the file
iOS
- Open the file
<Project>/ios/<Project>/Info.plistand search forCFBundleIdentifier:<key>CFBundleIdentifier</key>
<string>com.example.yourproject</string>
- Open the file
Programmatically retrieve
bundleIdfor iOS or AndroidUse the
expo-applicationpackage from the@thirdweb-dev/react-native sdkimport * as Application from "expo-application";
const bundleId = Application.applicationId;